News posts are a good way to keep patients informed about practice updates, events and other time-sensitive information.
Published news posts are automatically added to your website's news section, can appear on the homepage, and are emailed to patients who have subscribed to receive news from your website.
Add a new post
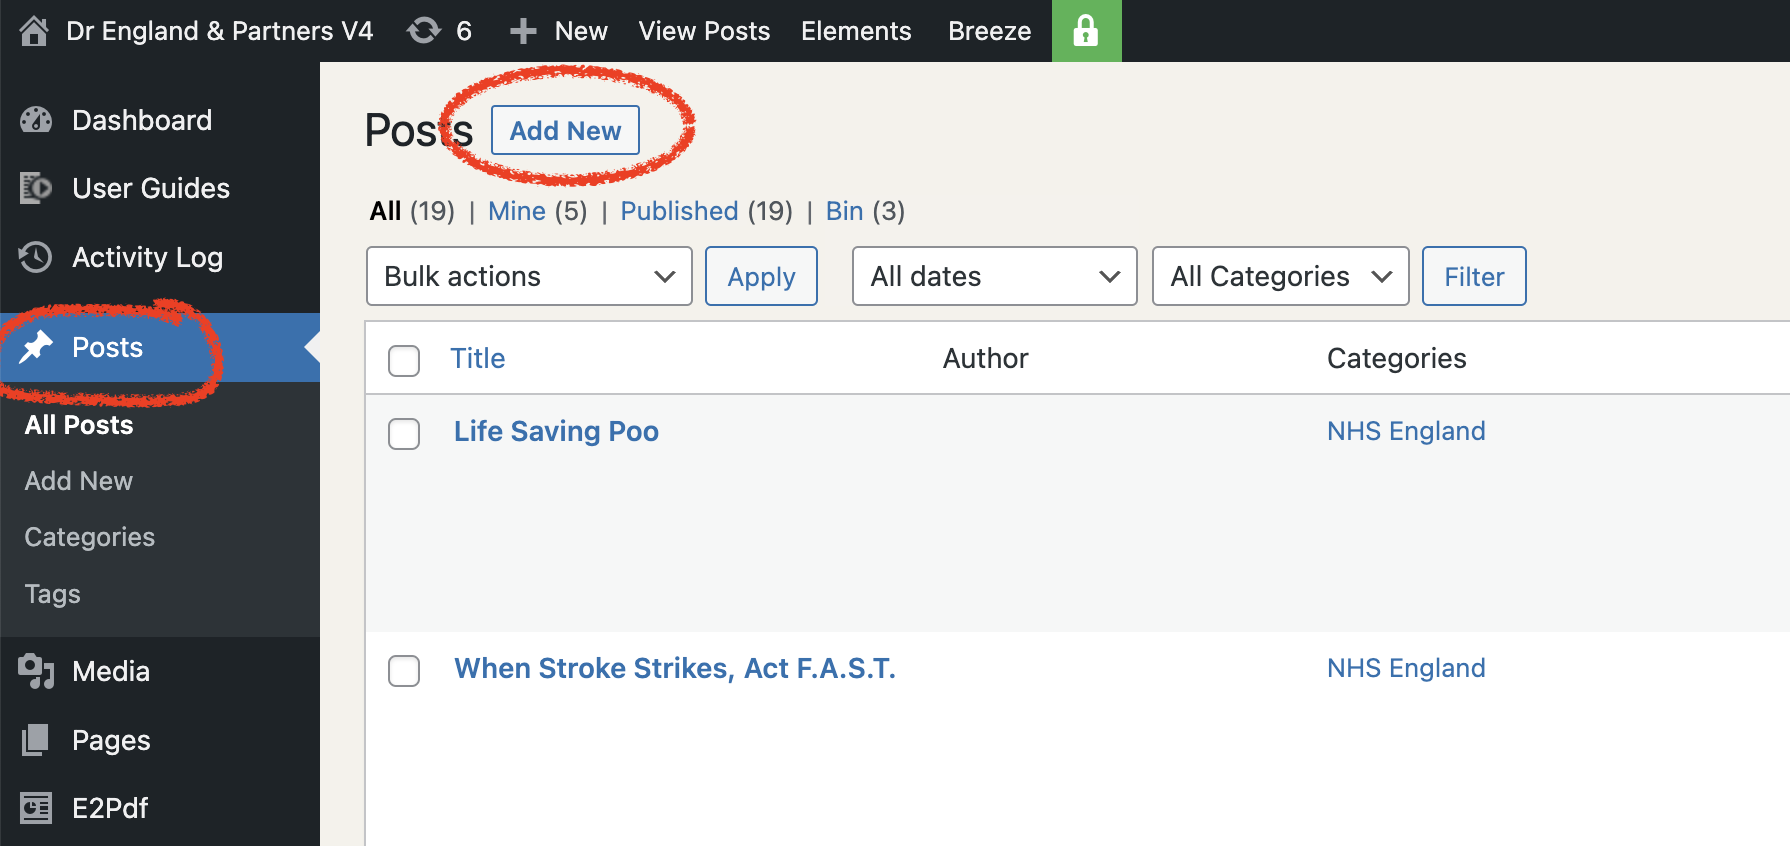
Log in to your website dashboard and go to Posts > Add New.
Add a title
Enter a short, clear title that tells patients what the news is about.
If the information relates to a particular date, include the date in the title where possible.
For example:
Practice closed for staff training – 14 October
This makes time-sensitive announcements clearer when they appear on the homepage and in emails sent to subscribers.
Add your news
Click below the title and start typing your news.
For most news posts, simple text with clear headings and links where appropriate is all you need.
You can use the + button to add other content, such as a heading, list or image.
Add a featured image
You can add a Featured image from the settings on the right of the editor.
The featured image represents the news item when it is displayed in parts of your website.
Choose an image that is relevant to the news and remember to add appropriate alternative text where the image conveys information.
Choose a category
Open Categories in the post settings and select an appropriate category if required.
If the news is particularly important and you want it to appear in the yellow Important News banner, see Adding Important News to your website.
Publish your news
When you are happy with the post, select Publish.
Remember that publishing a news post will also send it to patients who have subscribed to receive news from your website, so check the title and content carefully before publishing.
After publishing, check the post on your website to make sure everything appears as expected.
Schedule news for later
You do not have to publish a news post immediately.
In the publishing settings you can choose a future date and time. WordPress will then automatically publish the news at the scheduled time.
This is useful for announcements that you want to prepare in advance.
Automatically remove out-of-date news
For information that will no longer be relevant after a particular date, you can use the PublishPress Future settings to set an expiry date.
This is particularly useful for temporary announcements because you do not need to remember to return to the website later to remove them.
Need to make the message more prominent?
For important announcements that patients may want to read in full, you can feature a news post in the yellow banner.
See Adding Important News to your website.
For short, urgent messages such as an unexpected closure or disruption to services, see Adding an alert to your website.
Was this article helpful?
That’s Great!
Thank you for your feedback
Sorry! We couldn't be helpful
Thank you for your feedback
Feedback sent
We appreciate your effort and will try to fix the article